
Step By Step Setup
We will walk you through a detailed setup process so you can be sure to get your bot up and running quickly.
First Create Your App
First, you'll need to create an App in the Discord Developer Portal if you don't have one already:
Enter a name for your app, then press Create.
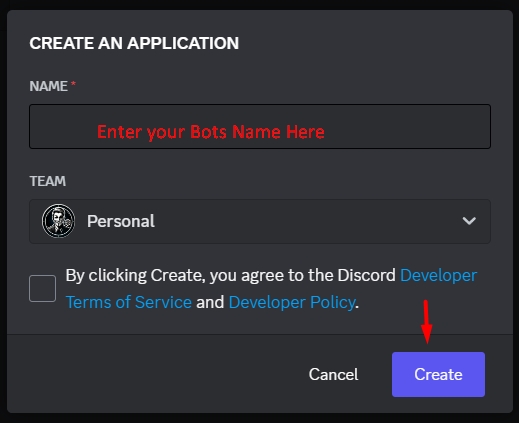
After you create your app, you'll land on the General Overview page
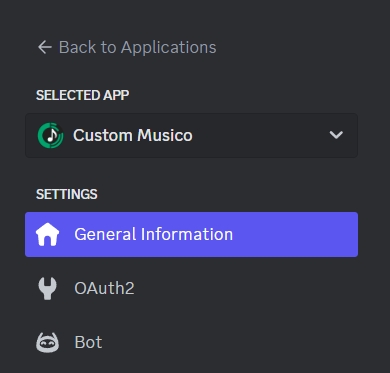
This is where you can update basic information about your app, like its description and icon. You'll also see an Application ID.
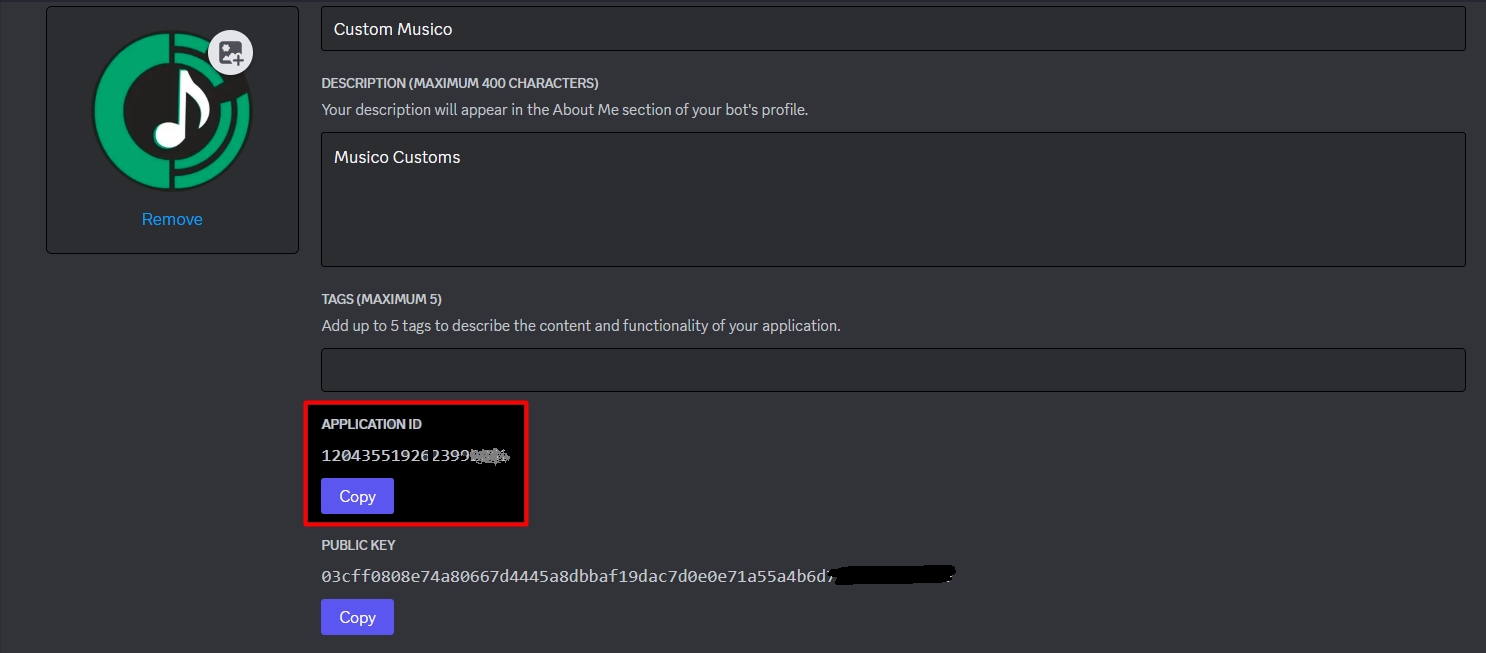
Copy the Application ID to a notepad or Take note of its location. You will need it to paste in your Customs Musico Dashboard later on.
The Bot Section
As you can see this is where you can set the "Username" and Choose your Custom Bots "Icon" (Avatar)

A) Get your Bot Token
You will see the "Reset Token" button, click it and copy the token down in your notepad, we will need that in the Customs Musico Dashboard later on.
B) Setting up Privileged Gateway Intents
You have to enable settings like its privileged intents in order for your bot to work correctly. See below for an example:

PRESENCE INTENT
Required for your bot to receive Presence Update events.
NOTE: Once your bot reaches 100 or more servers, this will require verification and approval. Read more here
SERVER MEMBERS INTENT
Required for your bot to receive events listed under GUILD_MEMBERS.
NOTE: Once your bot reaches 100 or more servers, this will require verification and approval. Read more here
MESSAGE CONTENT INTENT
Required for your bot to receive message content in most messages.
NOTE: Once your bot reaches 100 or more servers, this will require verification and approval. Read more here
OAuth2 Section (Adding the bot to your server)
Click on OAuth2 in the left sidebar, then select Bot Under the URL generator.
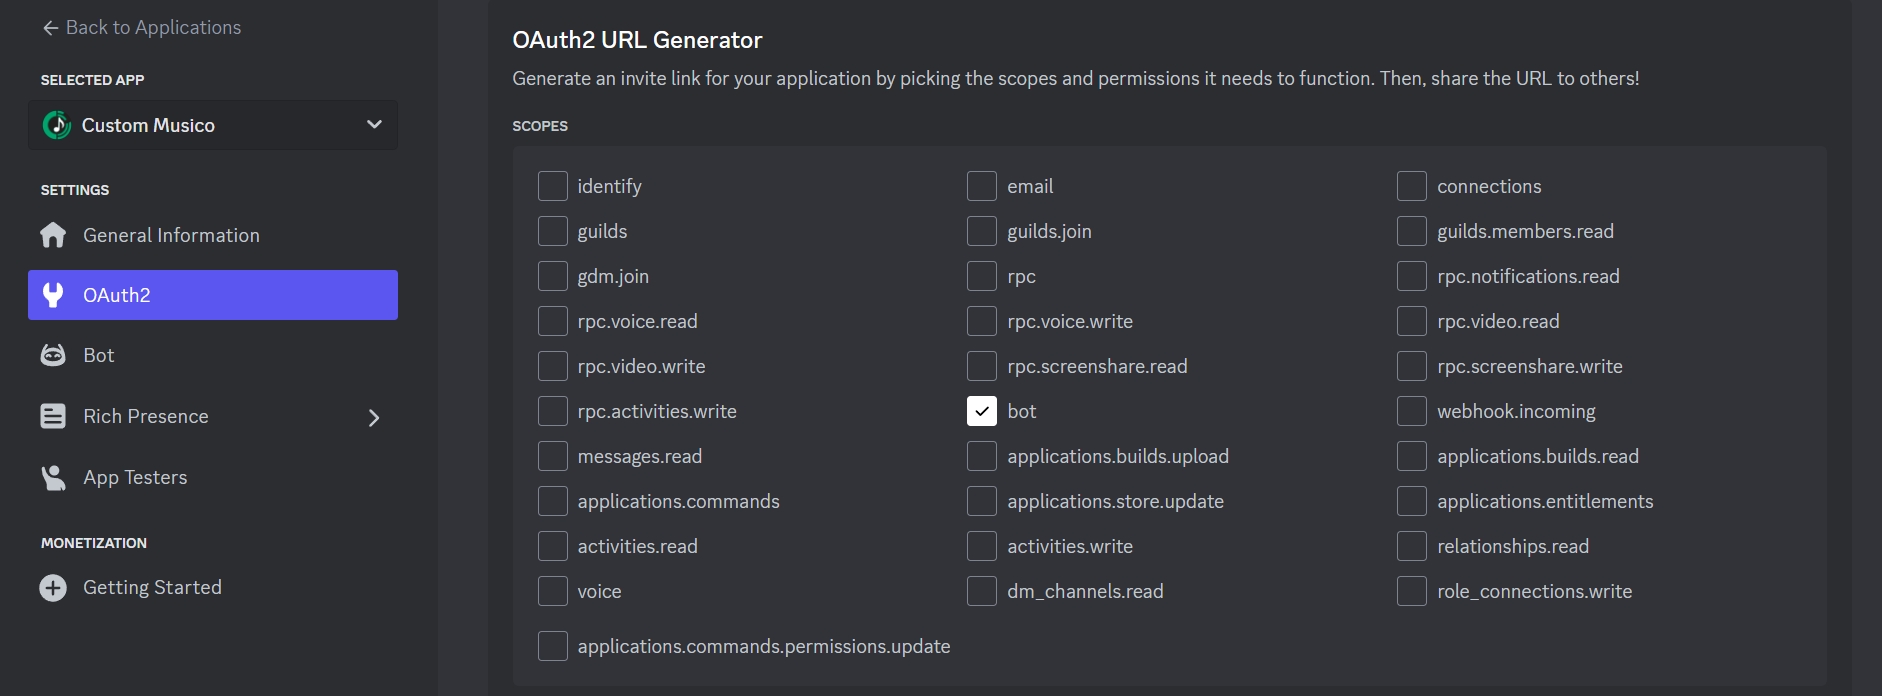
After you select Bot, you may also select different permissions for your bot. For now let us just check Administrator. This will generate the link at the bottom used to Invite your bot to your Discord Server!
Example of Selections Required to Generate Link:
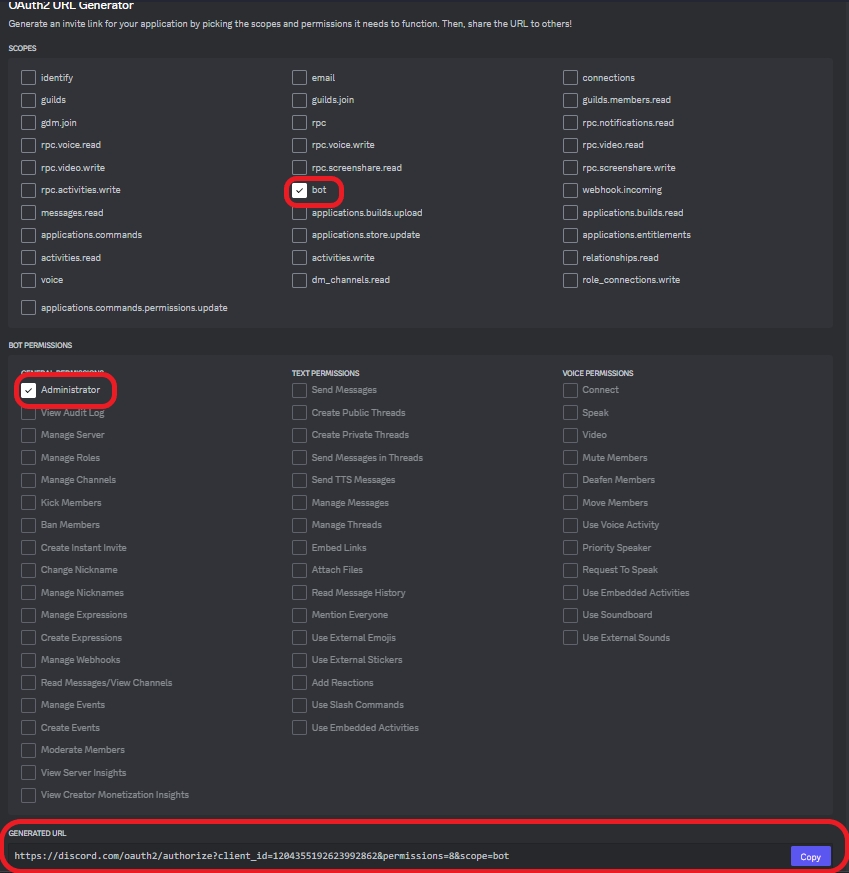
Copy and paste into your browser to invite your Music Bot to your Discord Server, Please Continue to the Custom Musico Dashboard to finish Setup.
Was this helpful?